Install Proxmox Backup Server + Tailscale NFS Share สำหรับ backup offsite (LXC)
ตัวอย่างนี้จะประกอบไปด้วย server 2 ตัวคือ
- Proxmox ที่ติดตั้ง PBS (LXC) ลงในตัว
- raspbery pi zero 2w ที่ติดตั้ง OMV ไว้เป็น storage
server ทั้ง 2 จะทำการคุยกันโดยใช้ tailscale เป็น VPN เชื่อมต่อผ่าน NFS Share
ส่วนของ Proxmox Server
ติดตั้ง PBS LXC
ใช้ script จาก https://community-scripts.github.io/ProxmoxVE/scripts?id=proxmox-backup-server
bash -c "$(curl -fsSL https://raw.githubusercontent.com/community-scripts/ProxmoxVE/main/ct/proxmox-backup-server.sh)"หลังจากนั้น Disable Enterrpise Repo แนะนำให้ Yes ทุกข้อ
bash -c "$(curl -fsSL https://raw.githubusercontent.com/community-scripts/ProxmoxVE/main/tools/pve/post-pbs-install.sh)"อย่าข้าม Disable Enterrpise Repo ไม่งั้นลงไม่ได้
ติดตั้ง Tailscale
จาก https://tailscale.com/kb/1031/install-linux
curl -fsSL https://tailscale.com/install.sh | shหลังจากติดตั้งแล้วมันจะแนะนำให้ tailscale up ซึ่งมันจะรันไม่ได้ ต้องทำตามนี้ก่อน
https://tailscale.com/kb/1130/lxc-unprivileged
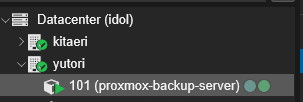
ดู lxc id จากตัวอย่างคือ 101
ไปที่ shell ของตัว server ดูเลข id ให้ตรงแล้วใส่คำสั่งลงไปเช่น
nano /etc/pve/lxc/101.confเพิ่มลงไปในแถวสุดท้าย
lxc.cgroup2.devices.allow: c 10:200 rwm
lxc.mount.entry: /dev/net/tun dev/net/tun none bind,create=file
กด ctrl+x หลังจากนั้น y และ enter ออกมา
reboot lxc และลองพิมพ์ tailscale up จะพบว่าใช้งานได้แล้ว
ให้ทำการ copy url ไป authenticate เข้า id เราตามปกติ (อย่าลืมไป disable key expire ด้วย)
หลังจากนั้นให้ทำ NFS Share ได้ตามปกติ